Create a Stunning Valentine’s Day Wreath
How to Create a Stunning Valentine’s Day Wreath to Wow Your Guests
Valentine’s Day is right around the corner, and what better way to share the love than with a bold and beautiful wreath on your front door? This “Happy Valentine’s Day” wreath is the perfect way to showcase your creativity and celebrate the season of love. In this tutorial, I’ll walk you through how to create this festive wreath step by step. Whether you’re a seasoned wreath maker or a beginner, you’ll love how easily this comes together!
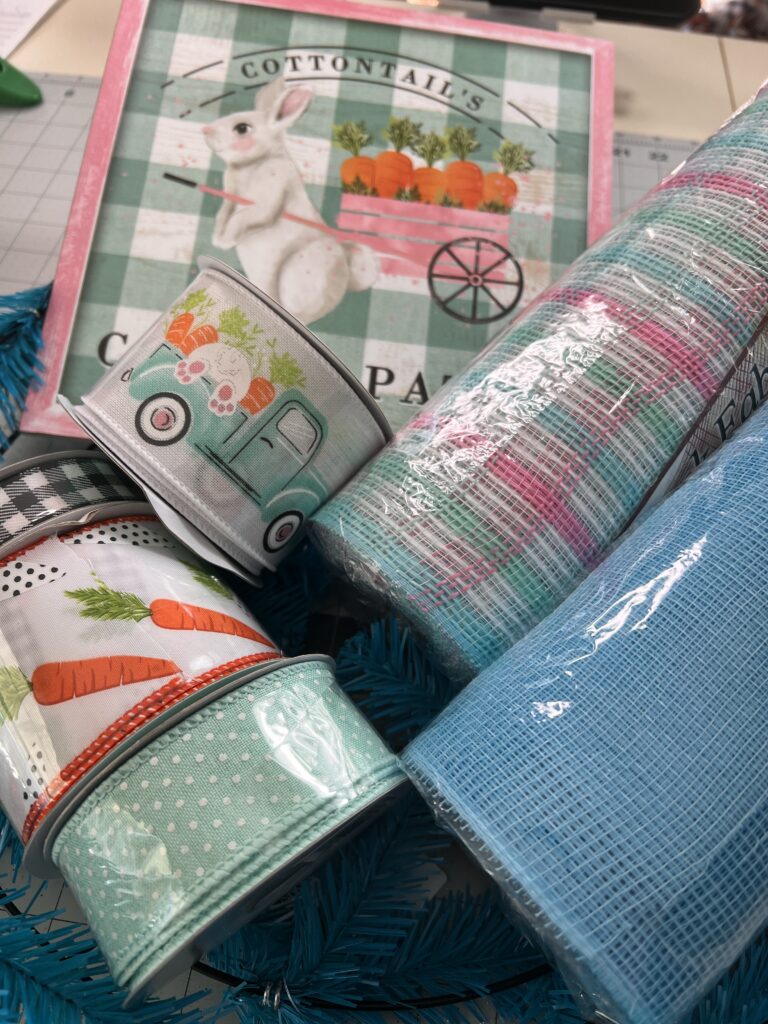
Materials You’ll Need:
- Base: White elevated tinsel tie work wreath frame (18 ties).
- Mesh:
- 10-inch pink or red deco mesh.
- 10-inch white deco mesh.
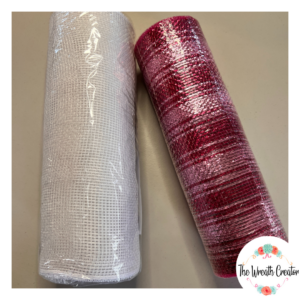
- 10-inch pink or red deco mesh.
- Ribbons:
-
- 2.5-inch wired red ribbon with pink hearts.
- 1.5-inch wired pink polka dot ribbon.
- 1.5-inch striped Valentine-themed ribbon (red and pink).
- 2.5-inch red burlap ribbon.

- 2.5-inch wired red ribbon with pink hearts.
- Sign: A Valentine’s Day-themed metal or wooden sign (“Happy Valentine’s Day”).

- Embellishments:
-
- Glittery pink ball picks.
- Decorative foam hearts.
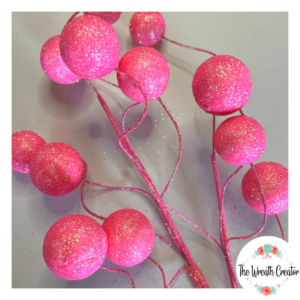
- Glittery pink ball picks.
- Tools:
-
- Scissors.
- Rotary cutter.
- Hot glue gun and glue sticks.
- Pipe cleaners (if needed).
- Scissors.
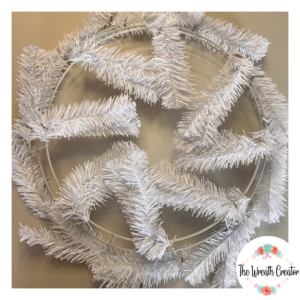
Step 1: Prepare Your Wreath Base
Start by fluffing out the ties on your white work wreath frame. This will create a full and even base for your wreath. Make sure each tie is spread out evenly so you can easily attach your mesh and ribbons.
Step 2: Add Your Mesh
- Cut the Mesh:
- Using your rotary cutter, cut both the red and white deco mesh into 10-inch strips. You’ll need about 18 strips of each color.
- Using your rotary cutter, cut both the red and white deco mesh into 10-inch strips. You’ll need about 18 strips of each color.
- Create Ruffles:
-
- To make a ruffle, lay one strip of mesh flat and scrunch it up through the center until it resembles a bow.
- To make a ruffle, lay one strip of mesh flat and scrunch it up through the center until it resembles a bow.
- Attach the Ruffles:
-
- Alternate between red and white ruffles, securing one to each tie on the wreath frame. This will create a full and fluffy base for your design.
- Alternate between red and white ruffles, securing one to each tie on the wreath frame. This will create a full and fluffy base for your design.
Step 3: Cut and Prep Your Ribbons
- Cut Ribbon Strips:
- Cut each ribbon into 13-inch strips/ribbon tails. You’ll need at least 9 strips from each type of ribbon.
- Cut each ribbon into 13-inch strips/ribbon tails. You’ll need at least 9 strips from each type of ribbon.
- Dovetail the Ends:
-
- Fold each ribbon strip in half lengthwise and cut at an angle to create a professional-looking dovetail.
- Fold each ribbon strip in half lengthwise and cut at an angle to create a professional-looking dovetail.
- Bundle the Ribbons:
-
- Pair a 2.5-inch ribbon with a 1.5-inch ribbon, layering them on top of each other. Pinch them at the center to create a bundle.
- Pair a 2.5-inch ribbon with a 1.5-inch ribbon, layering them on top of each other. Pinch them at the center to create a bundle.
Step 4: Attach the Ribbons
Secure each ribbon bundle to a tie on the wreath frame, layering it over the mesh. Alternate the patterns and colors for a balanced look. Fluff the ribbons so they fan out beautifully and don’t overlap too much.
Step 5: Add the Sign
Position your Valentine’s Day sign slightly off-center for visual interest. Use pipe cleaners or floral wire to attach the sign securely to the wreath frame. Make sure it’s snug but doesn’t sink into the mesh.
Step 6: Embellish with Picks
Take your glittery pink ball picks and foam hearts and tuck them into the design. Use hot glue to secure them in place, focusing on areas that need an extra pop of color or texture. These embellishments add a fun and whimsical touch to your wreath.
Step 7: Fluff and Adjust
Once everything is attached, take a step back and look at your wreath. Adjust the ribbons and mesh to make sure everything looks balanced and full. Fluff the ribbons and ruffles for the final touch.
Tips for Success:
- Keep It Symmetrical: When adding ribbons and embellishments, try to balance the colors and textures around the wreath for a cohesive look.
- Use High-Quality Materials: Invest in wired ribbons and durable mesh for a wreath that lasts.
- Personalize It: Swap out the sign or ribbons to match your personal style or add a monogram for a custom touch.
Share the Love!
I hope this tutorial inspires you to create your own Valentine’s Day wreath. If you give it a try, I’d love to see your creations! Share a photo in our wreath-making community or tag me on social media. Let’s spread the love and creativity this Valentine’s season!
Happy Crafting! ❤️